How to Connect DbGate to Azure SQL Database
Published: 2025-11-10
Managing cloud databases doesn’t have to be complicated. This guide walks you through creating a Microsoft SQL Server database on Azure and connecting it to DbGate – giving you a powerful, user-friendly admin interface for your Azure SQL databases.
Why DbGate for Azure SQL?
While Azure Portal provides basic database management, DbGate offers:
- Intuitive data browsing with powerful filtering and search
- Visual query designer – build queries without writing SQL
- Database chat with AI – ask questions in natural language
- Export/import tools supporting multiple formats (CSV, Excel, JSON)
- SQL editor with autocomplete and syntax highlighting
- Schema comparison and migration tools
- Cross-platform support – works on Windows, Mac, and Linux

Part 1: Creating an Azure SQL Database
Step 1 - Sign In to Azure Portal
- Navigate to portal.azure.com
- Sign in with your Microsoft account
- If you don’t have an Azure subscription, you can start with a free account
Step 2 - Create a New SQL Database
- Find Azure SQL | SQL databases
- Click “Create”
Step 3 - Configure Basic Settings
Fill in the following details:
Project Details:
- Subscription: Select your Azure subscription
- Resource Group: Create a new one or use an existing group (e.g., “dbgate-demo-rg”)
Database Details:
- Database name: Choose a meaningful name (e.g., “myapp-db”)
- Server: Click “Create new” if you don’t have an existing server
Step 4 - Configure SQL Server
When creating a new server, provide:
- Server name: Must be globally unique (e.g., “myapp-sql-server-2025”)
- Location: Choose the region closest to your users
- Authentication method: Select “Use SQL authentication”
- Server admin login: Create an admin username (e.g., “sqladmin”)
- Password: Create a strong password and save it securely
Click “OK” to create the server.
Wait for the deployment to complete (typically 2-5 minutes). Press “Go to resource” once done, you will see the database overview page.

Step 5 - Configure Networking
If you need to connect your database from DbGate desktop app on your local machine, configure the following networking settings. If you plan to connect only from Azure services (and use DbGate for Azure), you can skip this step.
- Click the “Configure access” button, the Networking settings will be shown, stay on “Public access” tab
- Under Public network access, Choose “Selected networks”
- Under “Firewall rules”:
- Set “Allow Azure services and resources to access this server” to “Yes”
- Set “Add current client IP address” to “Yes” (this allows your computer to connect)
- If you’ll connect from multiple locations, you can add additional IP ranges later
- Click “Save” to apply the firewall settings
Part 2 - connect from local machine
Step 1 - Install DbGate
If you haven’t already:
- Visit dbgate.io/download
- Download the appropriate version for your operating system
- Install and launch DbGate
Step 2 - Create a New Connection
- In DbGate: Click File/“New Connection” button
- Select “Microsoft SQL Server” as the database engine
Now you should be able to connect from your local machine, eg. with DbGate. Server and user are displayed on the database overview page (“Server admin” and “Server name”). Password is the one you created earlier.

Part 3 - connect from DbGate on Azure
Step 1 - Create a new Virtual Machine
- Navigate to Compute infrastructure | Virtual machines
- Click “Create”
- Choose Subscription and Resource Group
- Choose appropriate Virtual machine image (e.g. dbgate-ubuntu-2204)
- Choose Image - click “See all images” and search for “dbgate”, the choose DbGate (database manager). If you choose “Gen 1”, you need to use “Standard” security type.
- Choose VM size - for testing, “Standard B1s” is sufficient, for production, choose appropriate size
- You need to create or reuse SSH pair for connecting to DbGate server from SSH, create SSH key pair - you will use generated private key to connect from your local machine
- Check your data and create the VM
- If you have chosen creating new SSH key pair, download the private key and save it securely
Step 2 - Use DbGate and create connection to Azure SQL
- Click “To to resource” once VM is created
- On VM overview page, copy the public IP address
- Open IP address in your browser, you should see DbGate web interface
- Set admin password for DbGate web interface
- Click “Connections”, then “New Connection”. Create new connection to Azure SQL database using same steps as in “Part 2 - connect from local machine”, use server name, admin user and password created in “Part 1 - Creating an Azure SQL Database”
Step 3 - configure access to your connection
- By default, nobody could access the connection created in DbGate on Azure VM
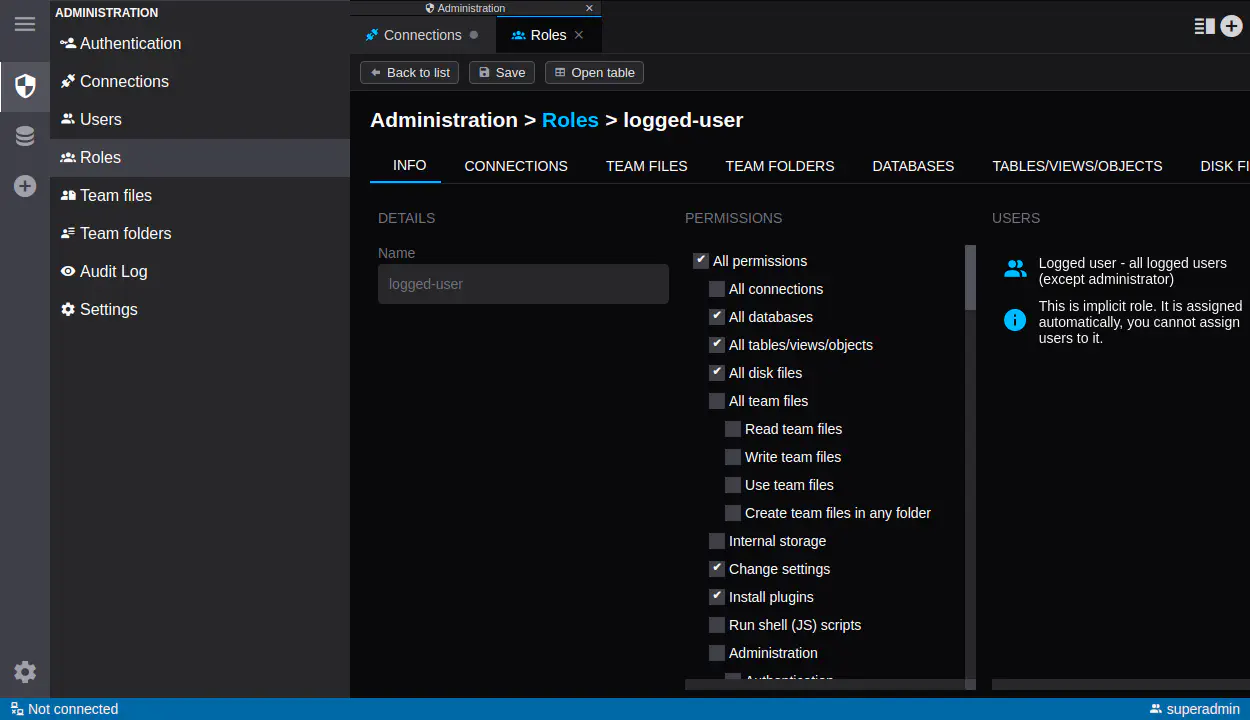
- Choose “Roles”, choose “superadmin” role and click “Permissions” tab. Check “All connections” and click “Save”
- Refresh a page (permissions are reloaded on page refresh), now you should see the connection in DbGate and be able to use it
- Create additional users/roles as needed to manage access to your database connection (use Roles tab)
Conclusion
You have successfully created an Azure SQL Database and connected it to DbGate, either from your local machine or from a DbGate instance running on an Azure Virtual Machine. With DbGate’s powerful features, you can now efficiently manage and interact with your Azure SQL databases. Explore more of DbGate’s capabilities to enhance your database administration experience!